Adding a Custom Resource Block with Quick Links Styling
There are a number of useful field customizations (the tabs you add content in when creating/editing a page) included in the UT Drupalkit templates. One of those fields is called Quick Links. I find the Quick Links field to only really be useful for adding external links since it uses plain text boxes that you have to manually paste in links that you want to add to the page. Since this is a pain text field, there is no link searching when you start typing like when you use the WYSIWYG A and B fields with the editor, making this fields usefulness very limited. With that being said, the quick links styling looks better than plain text and links.
I've created custom styles that tie into the quick link styles allowing you to use the styling in a much more flexible way, like in the WYSIWYG B field or a reuseable resources block where you can get the helpful auto link searching for links and files local to your site.
*Note - These instructions assume some basic knowledge of html code and or comfort with working in the source view. Regardless of your experience, I think the instructions below are pretty straight forward and that you should have no trouble implementing these custom styles following the steps below.
Part 1 - Use the Proper Heading and Add Styles
Typically, we use and start our heading cascade with <h3> for sidebar headers, also known as "Heading 3", if you're selecting the size from the styles dropdown in CKEditor. The sidebar is not a proper place for an <h2> or "Heading 2" in priority or size as those should typically be kept to the primary body content of the page (WYSIWYG A).
- Decide if you're using WYSIWYG B (we typically use this for the sidebar content) or a re-useable content block at Structure > Blocks > + Add Block (/admin/structure/block) (if you're going to use this content in a variety of places and don't want to have to edit it many times should it require a change)
- Add the <h3> tag or "Heading 3" style tag around your desired heading text, ie - <h3>My Heading</h3>
- Switch to Source View and add the required class like so: <h3 class="sidebar-heading">My Heading</h3>
- If part 2 is not applicable, you can stop here
- When finished your heading will look like the image below:

Part 2 - Add Styling to Your List of Links
This class adds this carrot arrow ">" and other matching visual styles to your links, making them look the same as they would if you used the Quick Links field.
- Create your list if you haven't already
- Switch to the Source View and add the required class to your list: <ul class="quick-links-type"></ul>
- When finished your links will look like the image below:

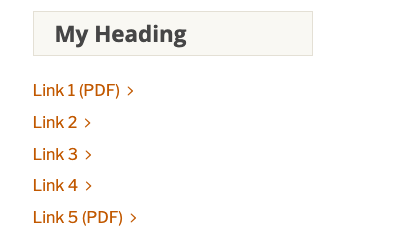
Putting It all Together - Final Output
Your code and final styled output should reflect the following (file and node links are just for representation of managed drupal links):
Finalized Code Formatting
<h3 class="sidebar-headline">My Heading</h3>
<ul class="quick-links-type">
	<li><a href="">Link 1 (PDF)</a></li>
	<li><a href="">Link 2</a></li>
	<li><a href="">Link 3</a></li>
	<li><a href="">Link 4</a></li>
	<li><a href="">Link 5 (PDF)</a></li>
</ul>
Published Page Display
Below is the result you should expect after placing the block on your page with the layout editor. If you used a WYSIWYG field, it will be under the first heading, "Page Components", in the left hand column of the layout editor selection menu, otherwise it will be under the "Standard Blocks" heading.